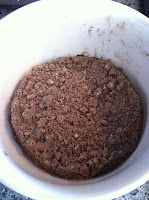
Gluten Free Black Bottom Cupcakes
Cream Cheese Topping
1/2 cup goat cheese
1/2 cup organic cream cheese
1 egg (whisked)
3 Tbsp. honey
1 Tbsp. vanilla
Blend the above ingredients together in a small bowl and set aside. *1 cup of cream cheese can be used if you do not like goat cheese.
Preheat oven to 350'C. Line one and a half muffin tins with parchment paper liners (18 total).
Chocolate Batter (black bottom)
3 cups almond flour
1/4 cup cocoa powder
3/4 tsp baking soda
3/4 tsp salt
1/2 cup unpasteurized honey
1/2 apple sauce
3 large eggs
1 tbsp vanilla
1/2 dark chocolate chips
Place a large tablespoon of chocolate batter into the lined muffin tins. Place two cherries (or a teaspoon of fruit only jam) into the middle of the batter. Push down slightly to create a hole. Spoon 1 teaspoon of the Cream Cheese topping on the top.
Bake for 20-25 minutes until a toothpick inserted in the middle comes out dry. Let cool completely before serving.


The holidays always meant black bottom cupcakes made by my mom! Well, today I will be making these instead of her recipe so my tummy will be happy :) Thanks for the recipe!
ReplyDelete